One Room Challenge Spring 2017 - Week 5 - DIY Wood Bead Light
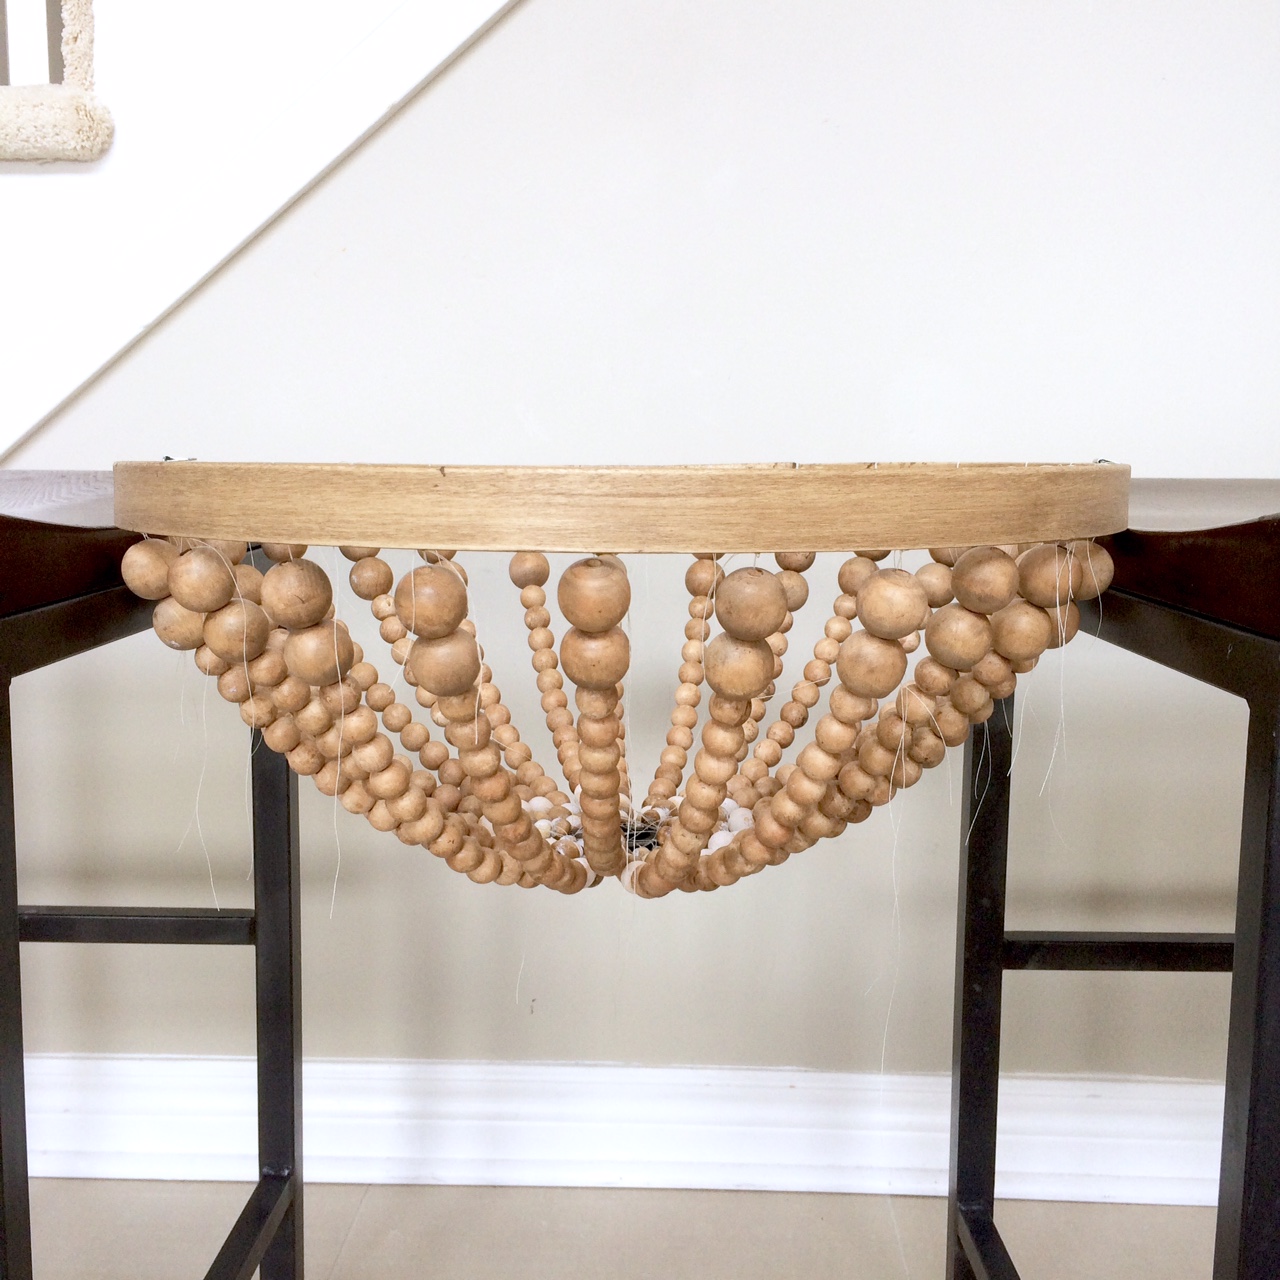
Week 5 of the One Room Challenge is upon us already. To be honest I'm not as far along as I'd like to be (seems like this is the norm though). With that said I don't have any glamour shots of the room to show you so here's a little DIY wood bead light I made for my laundry room makeover.
My laundry room was plagued with the dreaded boob light so I decided to give it a makeover. The best thing about this boob light upcycle is that it doesn't involve any electrical - I simply replaced the shade.
Here is the before pic of my laundry room flushmount light fixture:
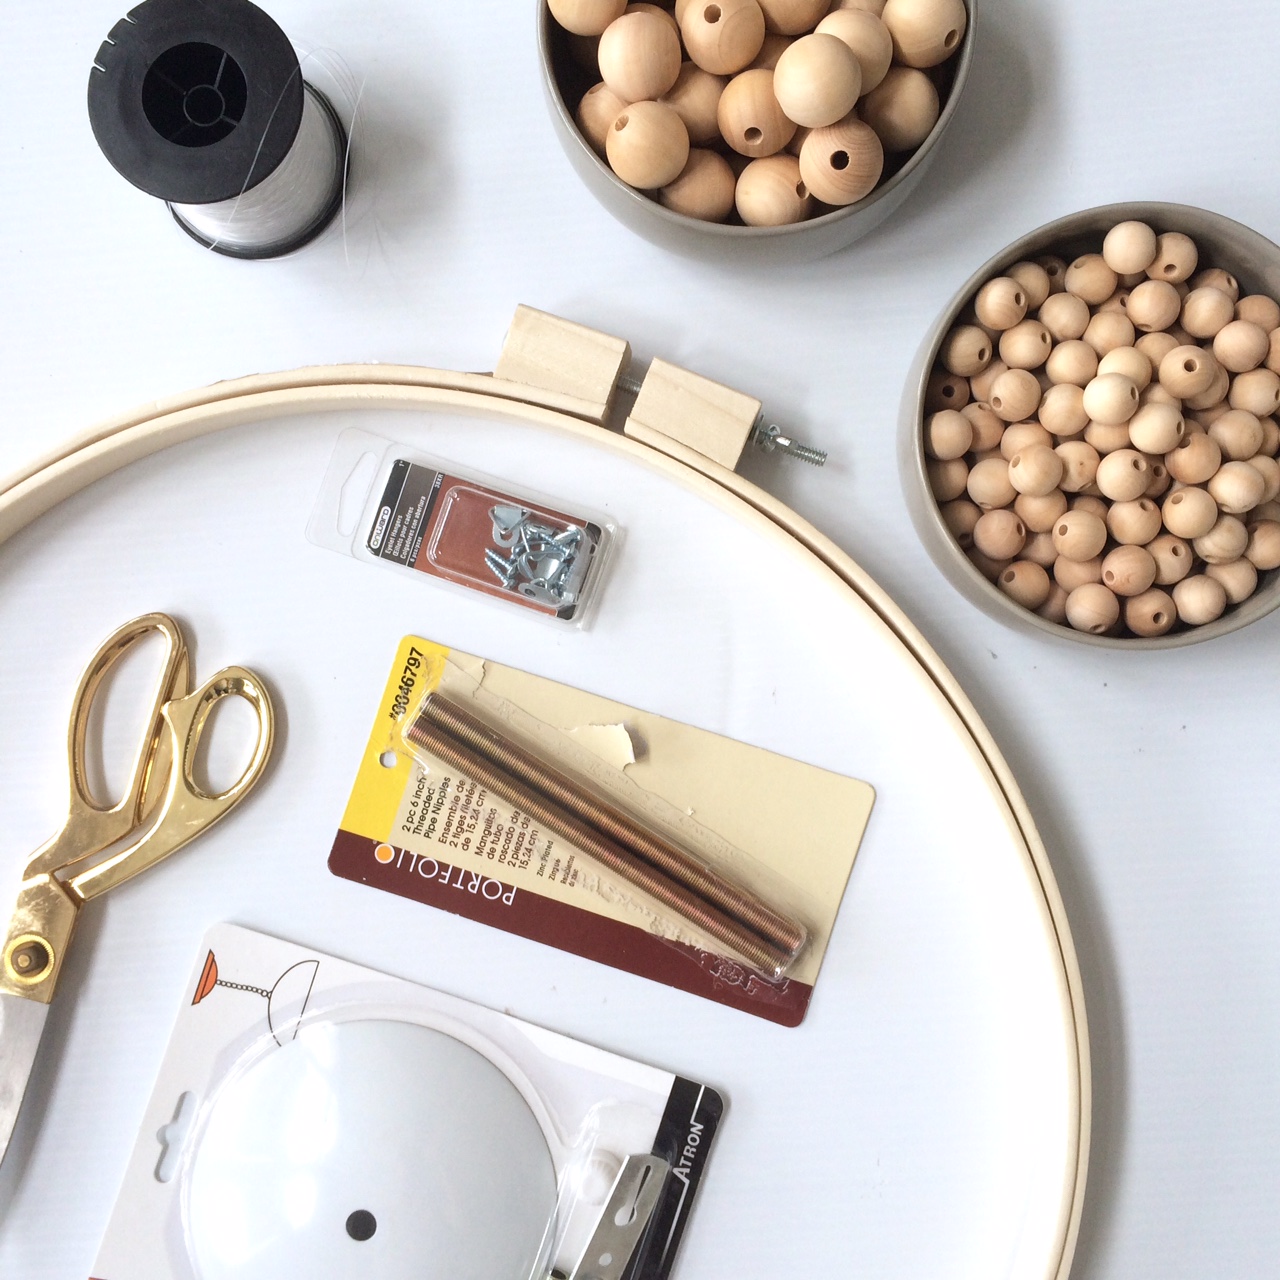
Here are the things I used in this DIY project; wooden beads (I ordered these from The Beaded Bead on Etsy and Sharri is fantastic!), wooden embroidery ring, Minwax premoistened stain clothes (not shown) thread, scissors, ceiling cap plus extender and cuppler, hot gun, d-rings, rubber plumbing ring (not shown).
I began by staining the wooden embroidery hoop and all the wooden beads using the Minwax pre-moistened stain clothes (natural oak).
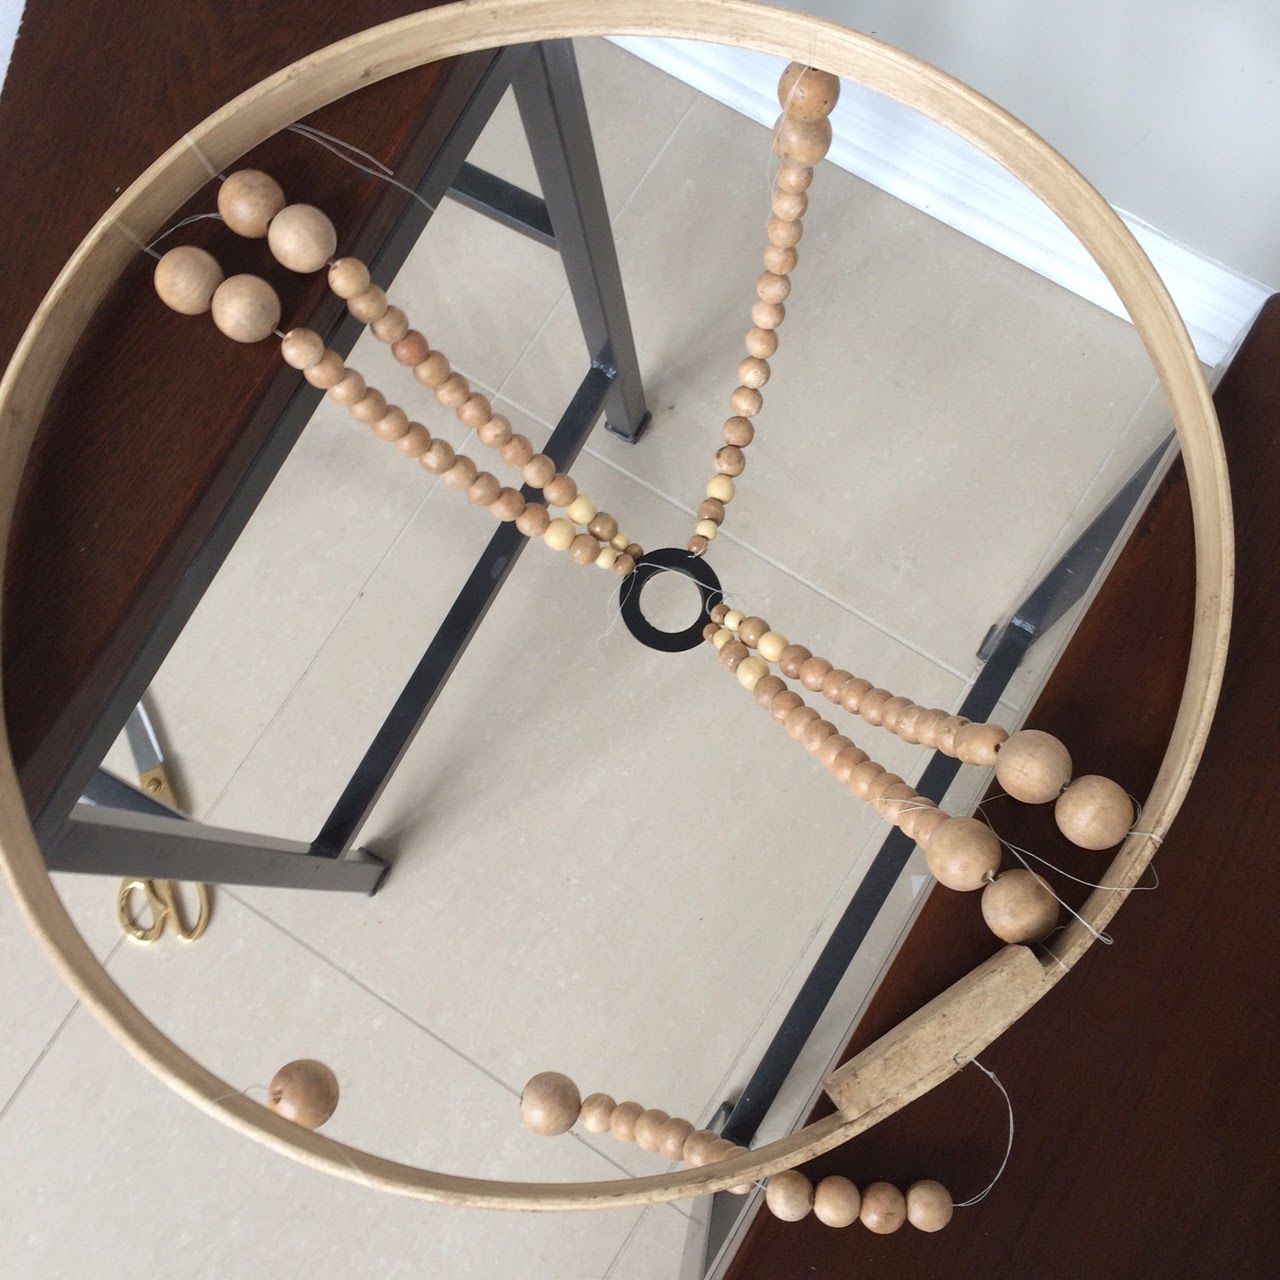
I took out the inside of the embroidery hoop and mapped out a general pattern for my bead light - using large beads at the top and tapering down to the smaller beads. With some simple math I roughly marked out where each string would land.
I doubled up some thread and began stringing the beads. I chose thread because I wanted to use a needle for ease and to be honest it was all I had on hand. I sewed each bead string into a rubber plumbing ring (I know sounds odd but it totally worked).
Let's be honest, this took forever.
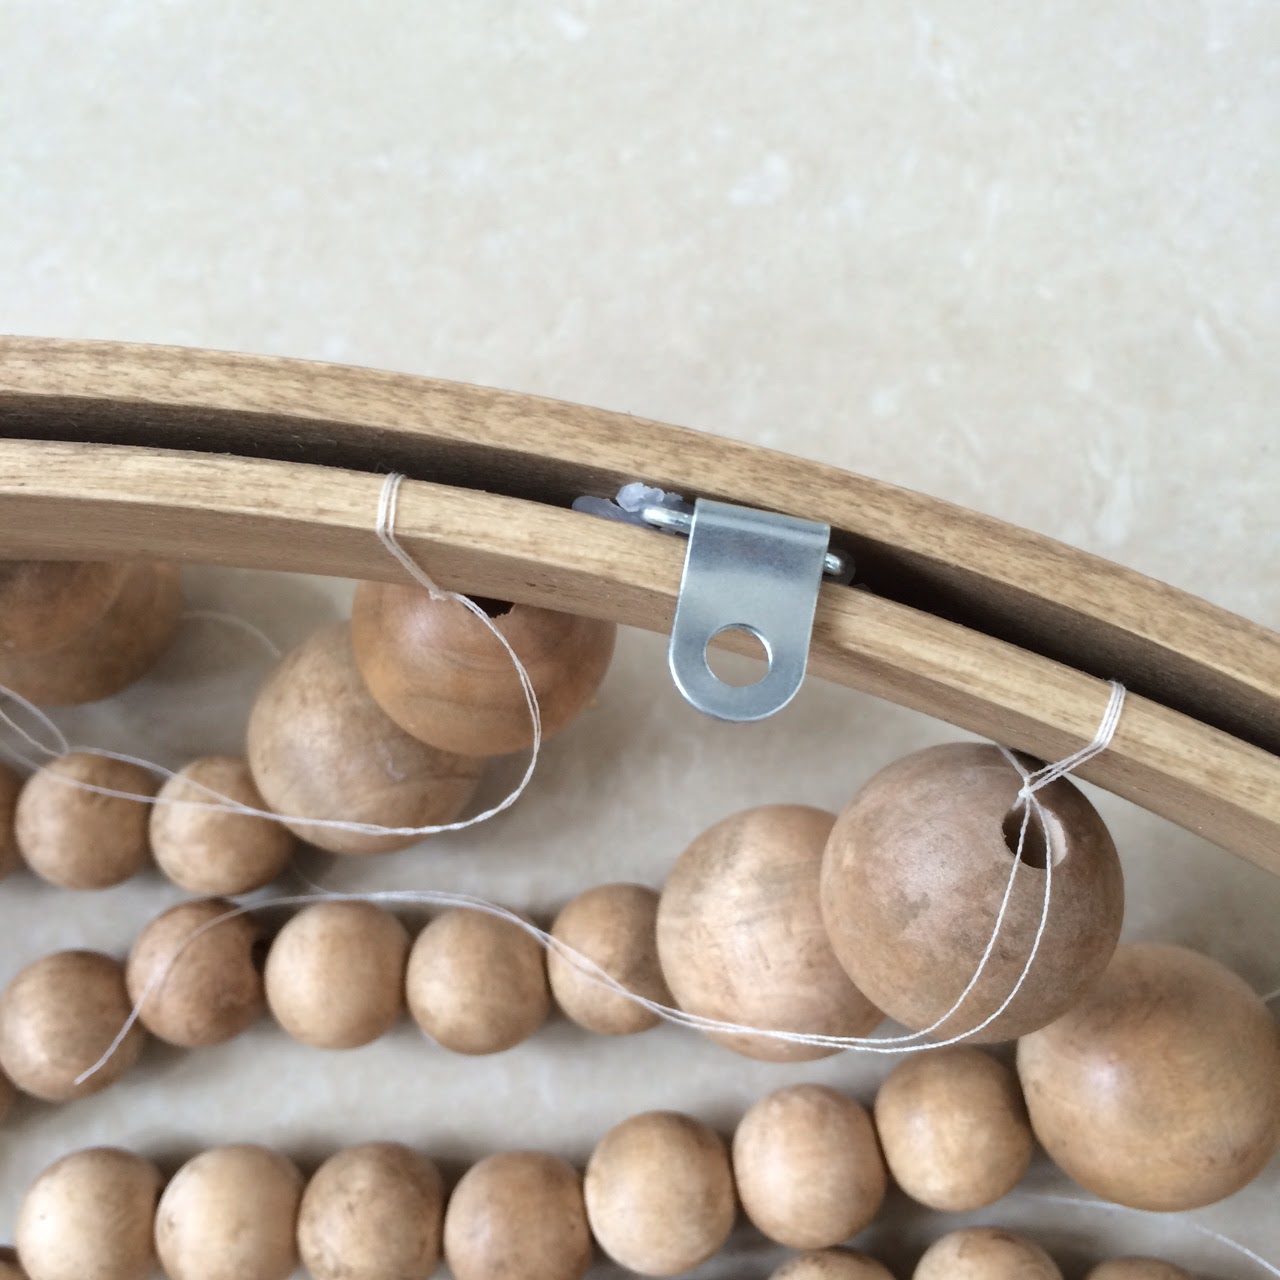
I glued each thread knot down with hot glue, glued on the D-rings so I could attach the fixture to the ceiling and placed the outer embroidery ring on permanently.
My husband drilled it into the ceiling and I loved it. I don't love that you can see the old light rim but I'm learning to get over it. Note, I'm working on getting better photos - not much natural light in this room. PSS - I might still give it a white wash (not sure, what do you think?).
Be sure to check out the other designers participating in the One Room Challenge and the guest participants at Calling it Home.
To catch up on my overall laundry room plans check out Week 1, my demo in Week 2 and drywall repair in Week 3 and counters in Week 4.
Stay tuned next week for the big reveal (cross your fingers that my wallpaper arrives in time).


8 comments
Such a great DIY! I can't imagine how long it took but it looks so good.
ReplyDeleteThat looks so cool!
ReplyDeleteWhat a cool DIY! It turned out amazing. Can't wait to see the full reveal next week!
ReplyDeleteI would have never thought to update a light shade light that - so crafty! Excited to see the reveal :)
ReplyDeleteThat light is gorgeous! It turned out so good!
ReplyDeleteWhat size beads did you use? How many?
ReplyDeleteWooded beads can be heavy. Did you put anchors into the ceiling to hold the fixture up?
ReplyDeleteIt wasn't too heavy but, yes, I used anchors in the ceiling.
Delete